|
|
Photogram/RayographWhat is a Photogram/Rayograph?
Photograms are images that don't require a camera. They are made by placing items in any arrangement on a sheet of photo sensitive paper, to make the picture you then have to expose it to light. Wherever the paper is being covered by the object will stay white, whereas the surrounding uncovered paper will go black. Anna Atkins created photogram-like images using paper that could be exposed in sunlight and developed and fixed in water. Photograms/Rayographs are the result of experiments in the darkroom where chemicals (Developer/Stop/Fix) are used to activate the image which is finally washed in running water. Rayographs are the name given to photograms by the artist Man Ray. Otherwise they are the same type of image |
Alleshia's Rayographs
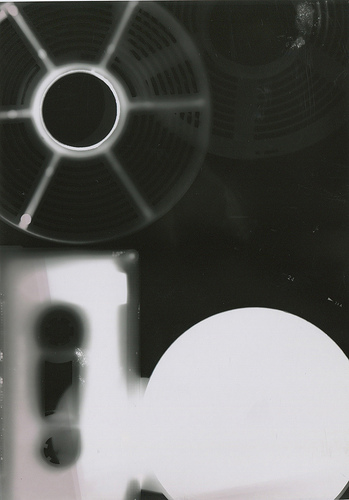
Image 1
I really like this image I made, I think it came out very well seen as it was my first time making a rayogram and also using 'the darkroom' |
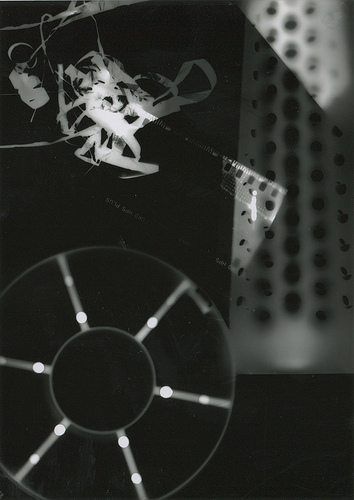
This is my second image, after having ago at my first image I was very excited to do my second. I thought my second would have came out better than my first but in my perspective it didn't come out as well,
|
To make a Rayogram you will need:
An enlarger
Photographic paper
Small/Interesting items
A dark room
1. You will need to have your enlarger already set up, make sure it can be easily turned off and on.
2. Then you have to lay the photographic paper under the light.
3. Place your items on the paper in a pleasing arrangement or pattern. You could place the images across the whole page and even experiment with over lapping them.
4. Turn the enlarger light on for your preferred amount of time, I used 10 seconds.
5. Turn off the enlarger light and tip/ put your items away. You are then ready to use the developer, fix and stop chemicals!
6. Then you need to rinse the print under water for a bit then hang it to dry.
7. You'll then need to visit Flickr and find you image.
If I was to make another Photogram I would be more calm about making it and think very carefully what items I may use and also where I would position them on the Photographic paper.


I went back to making Photograms as a group with Yasmin & Emily as a group, when making these photograms it was a lot easier making them as we already knew how to use the machinery in the darkroom, we explored a lot more where the bits and bobs in the box, we also contrasted the items we used more so it wouldn't be so random but have some link to each item used.
